Showing posts with label Recipes. Show all posts

Thursday, October 25, 2018

Kids In The Kitchen: Cooking With Sylvia

This afternoon Sylvia and I worked together making dinner.  I had gone down to the freezers this morning looking for dinner inspiration. As it was the first "cool" fall day, what better way to celebrate the arrival of cool weather than a cozy meal of beef stew? I got a beef roast out to thaw while we went about our morning of school and all the general goings on in a busy homeschooling, piano practicing, toddler-activity, baby-nursing household. 😊

By early afternoon it was thawed and after Silas started his nap I asked Sylvia to come to the kitchen with me.  I cleared off the counters while she got potatoes from the potato basket in the pantry.  I peeled the potatoes and she cut them into large chunks, tossing them into the roaster.  After we finished the potatoes, I peeled and she chopped up several carrots.  Then I pulled out an onion. "Oh no, I'm not chopping that! I'm allergic to onions!"  (She thinks that because it makes her eyes burn she is allergic. Haha!)  So I peeled and chopped the onion for her.

When we went to add the roast we realized that our small roaster wasn't big enough so we pulled out my big roaster ($5 find at Goodwill!).  We put the beef roast into the pan and seasoned both sides.  Sylvia added the vegetables and arranged them around before we seasoned them.  Next we sprinkled dried parsley all over everything.  We both thought it looked pretty!


Seasoning for a Beef Roast:
Season all sides generously with salt
Sprinkle with a bit of garlic powder and pepper
If adding potatoes and other vegetables, season them with salt and pepper.

Since this was a larger pan I did add about half a cup of water before we put it in the oven. Typically I don't add water as a beef roast (especially from a fattened beef animal) will render a nice amount of delicious broth.

I had also been wanting to make a pumpkin pie and thought this would be a good meal with which to serve pumpkin pie. :)  I found the recipe in my recipe book and showed it to Sylvia.  While I mixed up the crust she worked her way through the ingredients list, making the filling.  It was her first time independently following a recipe, but I wanted her to do it herself as much as possible.  I knew there was a chance of something getting goofed up, but there is something to be said for independent learning and the experience of being trusted with following a recipe all by yourself.

At one point she asked me to read the next ingredient amount (it was 3/4 tsp.) and I realized she had just interpreted 1/2 teaspoon as 1 teaspoon.  Since she had just put in the salt, and we didn't want salty pie, I scooped some of it back out.  After that she had me double check her reading of the measurements.  She measured everything by herself!  After she had everything added, she did the preliminary mixing and then I gave everything a good stirring to finish.

The pie baked along with the roast, making the house smell wonderful!  Supper was very delicious; the roast was amazing and had made a delicious broth that I made into gravy to pour over the vegetables.  For dessert we had Sylvia's pie.  It was very yummy and she was thrilled to serve it to us with whipped cream on top.


The pie was a little "extra" with the spices, but for her first time measuring spices and making a pie, I think it turned out very well!  I think the extra flavor came from accidentally packing the spices into the measuring spoons as she leveled them.  I will show her next time how to better measure, but I didn't want to rain on her parade too much the first time.

I am looking forward to having little cooks working in the kitchen with me this winter!!


This post contains affiliate links.
As an Amazon Associate I earn from qualifying purchases at no additional cost to you.
I was not paid to write this post.

Saturday, October 26, 2013

Spinach and Chocolate (Yeah, maybe I am pregnant!)

This is the blog post in which I must make a confession or two. My first confession is that I never liked spinach unless it was fresh and in a salad. Cooked greens of any type just do not do it for me. Ever. Period. No matter how they're cooked, seasoned, dressed, flavored, I just can't do it. I mean, I can. I'm a big girl and can choke down a bite or two to be polite to the host but the whole time I have this "moo-ing" sound going on in my head feeling like I'm chewing silage (what cows eat).

My second confession would be that I finally gave in to some recipes that called for spinach and looked so good. I was super skeptical but for some reason every time I looked at the pictures and read the recipes it just seemed like they would be utterly delicious.

Ham, Spinach and Tomato Frittata

I had a bag of frozen, chopped spinach in the freezer and one Saturday morning while Daniel and the girls were eating their traditional Saturday morning breakfast of cold cereal I tried the first recipe. The recipe is for Ham, Spinach and Tomato Frittata. I started reading Aliesha's blog, Feather in Our Nest last month and it was one of those "can't put it down until you read the entire archives - in order" kind of blogs. Anyway, I made the frittata generally following her recipe and adding cheese on top. 'Cause I'm a cheese girl. :-) It was so good!  Since then I've been making it a lot. At least a few times a week a lot. Daniel and the girls like it, too (Susannah calls it "froo-tata!!"). I love the mixture of flavors and that I'm getting iron from a good source (spinach). This recipe was just the start of my slide down the slippery slope...

The second spinach recipe I wanted to try was one I had seen early this year and thought it looked good, but ew, cooked spinach?? However, I kept thinking about it and looking at it. After loving the Ham, Spinach and Tomato Frittata I decided I had to at least try this other recipe. The recipe is for Skillet-Poached Eggs with Spinach, Pea Tendrils and Leeks (from GoodCheapEats.com). A few things going against my mind here were the "poached eggs" and the amount of spinach. I've never eaten/couldn't imagine eating poached eggs. I've seen too many runny-egg pictures of poached eggs to begin thinking of eating them. But, lo and behold, I still thought the recipe looked too good to not try at least once.

I didn't (and don't) have any pea tendrils or leeks, so I loosely follow the recipe. I use onion, frozen chopped spinach, bits of ham, the eggs (of course) and some pepper. (The ham I'm currently using is salty country ham so I don't need to add any salt.) After I saute the vegetables and meat I slide them to the sides and crack in the eggs. After seasoning with pepper I cover the skillet with a lid and let everything cook until the eggs are DONE. No runny egg for me, noooo thank you. The surprising thing? It is REALLY good. I do like to make sure my bites of spinach all have some egg with them, but even alone it's pretty good. SCORE for another great-tasting source for iron from spinach! I make this recipe about once a week, depending on how I feel like eating my eggs that day. :) I don't think I've made this for the girls but Daniel has tasted off my plate and said it was different but not bad. It is especially good served with a slice of buttered whole wheat toast. :)

Now on to the chocolate part. We ran out of milk on Tuesday. That meant Wednesday morning I had to miss my morning cup of Café con chocolate leche. (My fancy wording for mixing coffee with chocolate milk. ;-) ) I had hoped to pick up milk while I was in town Wednesday but the timing didn't work out. After church I mentioned to Daniel that we needed milk but I didn't want to unload-load the girls at the store just for milk (I needed to go grocery shopping sometime soon anyway). He had driven to church in his work van and Susannah was riding home with him. Sylvia and I got home before they did and they weren't right behind us like I thought they would be. After a while they got home. Lo and behold, not only did they have MILK, but Daniel had brought me a chocolate bar, too! And it wasn't just any old chocolate bar. It was Hershey's WITH ALMONDS.


He said that when they were getting ready to buy the milk he picked up the candy bar to buy also. Susannah asked what it was for and he told her "because it will make Mama happy." "Is Mama sad?" was her question. He told her no, I wasn't, but the chocolate would still make me happy. When I was giving him a hug and telling him thank-you for the chocolate - possibly grinning like a fool the whole time - he turned to Susannah and asked "What did I say the chocolate would do for Mama?" "Make her happy!!" was her answer.

Yes, it sure did make me happy. That morning I needed some chocolate medicine and broke into a plain Hershey bar because that was the best I could do. Needless to say, the next time I needed some chocolate medicine I went for the Hershey's with Almonds candy bar. It might not have lasted very long, either...

There you have it. My blog post about spinach and chocolate. I just need to make sure I eat more spinach than chocolate. ;-)

Wednesday, November 2, 2011

A Taste Through Time {Try New Adventures Thursday}

**I wrote this post on a Wednesday. The most mixed-up day I've ever had, I think! I woke up Wed. morning thinking it was Tuesday. Then somehow I realized it was not Tuesday, it was Wednesday. Then I sat down to write a post and my brain started thinking it was Thursday. All day yesterday I kept checking Alicia's Homemaking, waiting for her Try New Adventures Thursday post to go up so I could link, and I was thinking that she must be really busy since she didn't have it up already. Last night I was checking one more time when it dawned on me that it was not Thursday yet!! So, now that it IS Thursday, and Alicia DOES have her TNAT post up, I'm going over to link my Try New Adventures Thursday on a Wednesday post :) **

If you know me very well at all, you know I love to cook and bake. My kitchen is "my place" in our house. It is my favorite room to be in (unless I'm sleeping in bed, or curled up on the couch with a book or movie :) ). When I'm asked what my hobbies are, "cooking and baking" are always at the top of the list. If I had nothing else to do in this world, I think it would be great fun to open a little restaurant and bakery.

With that, it is no surprise that I have my "own" cookbook. Side note: I'm also a little OCD about my kitchen :) I don't like having recipes scattered between 20 different cookbooks. If I use them regularly, I want them all in the same place so they are right at my fingertips. I don't want to flip through a cookbook of 1,000 recipes to get the only one I use out of that book.

Daniel and I have been married for a little over 7 1/2 years. When we were first married my recipe collection was pitiful. Not because I didn't know how to cook or bake, I had just never taken the time to gather recipes for myself. That first summer I spent a lot of time copying recipes into 2 small binders, and I used them alot. Over time I was discovering that I also had a lot of recipes that while I knew what they were, I just didn't use them because they weren't favorites.

Three or four years ago those two original binders were starting to not be as efficient as I wanted them to be. So I spent another hunk of time copying down (by hand) only my favorites and the ones I knew I wanted. And by that time I'd added quite a few new favorites to the group. My current recipe book is a 2" full sized binder full of recipes, with plenty of bits and pieces of paper scribbled with even newer favorites stuffed in the side pockets.

When my youngest sister announced her engagement this summer, I knew immediately what I wanted to give her for a wedding gift. A copy of my cookbook. Many of the recipes she will be familiar with, because they are ones that we made and ate growing up. For the rest of them, hopefully we have similar tastes and she'll like them just as much as I do :)

I knew I didn't have time to hand-write each recipe, plus I wanted to make something that was cleaner and neater than handwriting on note-book paper. I love the way a clean, neat, freshly printed page looks, so I decided that typing and printing everything was the way I wanted to go.

Over the past few months, I spent spare time here and there going through my cookbook, typing up many of the recipes. I found some more to cull out, and plenty to add. I also learned the hard way to proof read before printing anything! I think I had printed 2 or 3 sections of the cookbook before I started proof-reading, discovering a lot more mistakes than I wanted to!

My sister was married this past Sunday, and last week I spent much of my spare time and a few late nights finishing it up. I had been thinking that I wanted a name for this cookbook, but nothing had ever jumped out at me or suddenly popped into my head. The word "taste" kept coming to mind and I was pretty sure I wanted to use it in the title somehow. The last day that I was working on it, I kept thinking over and over different titles including the word "taste." I came up with one I liked that didn't include the word "taste", but it reminded me too much of a very, very popular early 90's wedding song (Through The Years, anyone?). I just couldn't bring myself to name the cookbook Through The Years when all I could think of was that song. But I loved how it fit what the cookbook represents: recipes all the way from my grandparents generation to now.

With a little more grinding of brain gears, I finally had a name that represented the recipes collected and used over the years, A Taste Through Time. After a little more playing around with fonts and layouts, some whirring of the printer had the cookbook finished. I am very happy with the way it turned out. It was hard to wrap it up and give it away, not only because it was so neat and clean and pretty that I wanted to keep it for myself, but having it printed (even though just from my home printer) is something I've wanted to do for a long time.

I am very happy that my sister gets the first printed edition, and I hope she will get as much joy and as many miles out of her copy as I do mine!

~ A letter I wrote to my sister. ~


~ Alphabetical Index for the 231 recipes ~
One recipe per page, and the recipes in each
category are in alphabetical order.
I did it this
way so that if recipes get added in the future,
it could still be kept in alphabetical order.

~ Tabbed dividers for the categories ~
They are in alphabetical order, too. :)

Even though I tried to remember all the recipes I use less frequently (that haven't made it into my own copy yet), this week I have been making a list of recipes that I missed! I will get them typed up and printed off, along with an updated index, and give them to her the next time we see each other.

Thursday, March 4, 2010

Chicken Alfredo (with very little cheese)

I have been so not in the cooking mood this week, and it's been hard to come up with ideas for suppers. I think partly because I'm afraid to get something started and then have to leave it to go to the hospital. Last night was no exception. I knew we had more chicken than beef, so I pulled out two chicken breasts... with no idea what to do with them.

Daniel and I tossed around ideas. He wanted fajitas but we don't have tortillas or much of the other stuff. I suggested stir-fry but he didn't want Chinese. We settled half-way between Mexico and China - Italy :) Problem was, we only had a smidgen of both kinds of Parmesan Cheese. I decided to give it a try anyway and just started cooking, hoping that the end result would be delicious Chicken Alfredo. And it was! After we ate I wrote down how I made it, and my sister has demanded asked for the recipe.

(This made plenty for the two of us with some leftover. I'd say when served with a vegetable or salad it could easily make 4 servings.)

Chicken Alfredo

2 boneless, skinless chicken breasts
Oil
Slice chicken into ~1/4" slices about 1" long.
Cover bottom of large skillet with plenty of oil and heat to med-high heat. Add chicken, reduce heat to med. Season chicken with Salt and Pepper, cook and stir until chicken is done. Remove from skillet and set aside.
--------
2 Tbsp. butter
1 sm-med. onion, minced
2 large cloves garlic, minced or pressed
Add butter to skillet, saute onion and garlic until they start to turn translucent.
--------
1/4 - 1/3 cup flour
2 Tbsp. butter
Stir flour into onions/garlic, reduce heat and let it start to toast. Add butter, stir to melt and mix in.
Stir in:
1 cup milk and let it start to thicken.
Stir in:
1/2 cup heavy cream and let it thicken.
Stir in:
2 - 3 Tbsp. grated Parmesan Cheese
1" cube - sized piece of Parmigiano-Reggiano Cheese, grated
(or you could use all of one kind, it was maybe 1/3-1/2 cup total)
Stir in:
1/2 cup heavy cream
1/2 tsp. salt
freshly ground black pepper to taste
1 tsp. parsley flakes
Let thicken. Stir chicken into sauce and cook a few minutes to reheat the chicken.
Serve over cooked pasta.

Keep in mind that it's important to not boil the life out of cream or it will "break." And believe me, "broken" cream is gross. That's why you have to boil it slowly over low heat. If I'd had more cheese I definitely would've added in however much I felt was a good amount :) But this tasted very good. I also didn't think about using a little white wine until after we were eating it, that would've added a nice little flavor, too. Feel free to take this recipe apart and put it back together however you would like! I'm sure I won't make this exact recipe again, but now I have a good base idea for future "dump-cooking" Alfredo :)

Friday, February 26, 2010

Apricot-Garlic Chicken

The other day I needed to come up with something for supper. I wanted something that was good, new, and most of all, easy. I brainstormed for a bit, stirred up a concoction and it was really good!! I wish I hadn't run out of time and had been able to take a picture. Not only did it taste good, but it looked pretty, too :) I didn't measure the ingredients, so these are my close guesses:

Apricot-Garlic Chicken
2-4 boneless, skinless chicken breasts
1/3 cup Apricot Jam
2 med. garlic cloves, minced or crushed
1 Tbsp. mustard
1 1/2 tsp. honey
2 Tbsp. butter

Combine jam, garlic, mustard, honey and butter in small saucepan over med. heat until sauce-like. Place chicken in baking dish, spread with sauce. Cover and bake at 250° for 2 hours or until done (my chicken was frozen, so for thawed chicken you would lessen the baking time I'm sure). Serve chicken with pan juices.

This post is linked to LifeAsMOM and The Grocery Cart Challenge where each week 100's of recipes are shared.

Friday, February 19, 2010

Meatball Stroganoff

Throughout the life of my blogging and menu-planning, many of you have asked for the recipe for Meatball Stroganoff. I finally remembered to get pictures on Monday when I made it. The recipe can look very overwhelming, but it really is very easy.

I do need to say that I usually make the homemade noodles that are in the recipe, but we were out of eggs and I wasn't up to it so I used some of the FREE Barilla pasta that I "bought" last summer. It still tasted great! I do enjoy the homemade noodles, though.


Meatball Stroganoff

Noodles:
2 cups all-purpose flour
1 tsp. salt
3 egg yolks
1 egg
6 Tbsp. water

In a bowl combine the flour and salt; make a well. Beat yolks, egg and water; pour into well and stir to combine. Turn onto floured surface and knead 8-10 strokes. Divide into thirds, roll out each third as thin as possible. Let stand for 20 minutes or until partially dried. Cut into 1/4" strips, then the strips into 2" in length; set aside.

Meatballs:
1 egg, lightly beaten
2 Tbsp. ketchup
1/4 cup quick cooking oats
1 Tbsp. finely chopped onion
1/2 tsp. salt
1 lb. ground beef

In a bowl combine the egg, ketchup, oats, onion and salt. Add beef; mix well. Shape into meatballs. Place in 9" x 13" baking dish (meatballs should not touch each other). Bake, uncovered, at 400° for 10-15 minutes or until no longer pink.

Sauce:
2 cans Cream of Mushroom Soup
1 cup milk
1 cup sour cream
1 Tbsp. paprika

In a large saucepan combine soup, sour cream, milk and paprika; heat through. Add meatballs, cover and cook until heated through, stirring frequently.

Cooking the Noodles:
In a large pot bring 2 quarts of water and 1 tsp. salt to a boil. Add noodles. Cook for 12-15 minutes or until tender; drain. Toss with 1 Tbsp. butter or margarine and 1 Tbsp. minced parsley.

Serve meatballs and sauce over the noodles.

Notes: When I plan to make the noodles, I start them early in the afternoon. They take up a LOT of counter space, or I will sometimes pull out cookie sheets and transfer the rolled out dough onto them to dry. My dough always takes longer than 20 minutes to "partially dry," too, which is another reason I start early. Perhaps I just let it dry too much :)

Aside from the noodle-making, it only takes maybe 30 minutes to mix up the rest of the recipe if you time everything right (like, don't wait till the meatballs and sauce are done to start the pasta water :P ). Oops :) I was just proof-reading the recipe and realize that I don't usually cover the meatballs and sauce when I cook them. Like most recipes, this one is hard to goof so do whatever floats your boat :)

This post is linked to LifeAsMOM's weekly Ultimate Recipe Swap (or "URS").

Saturday, February 6, 2010

Homemade Chocolate Syrup

On a cold, snowy day like today, nothing beats snuggling up with a good book (or blog) and a mug of hot chocolate :) To "sweeten" the deal you can even make your own chocolate syrup! I haven't compared prices, but I'm very confidant saying that it is certainly cheaper than buying store-bought.

Growing up we kids learned to make chocolate syrup early on. It was a staple in our kitchen, to the point that one didn't often need to refer to the recipe book to make this recipe. It really is quite simple, only takes a couple minutes to make, and tastes great!

In a 2 quart, heavy saucepan combine the sugar, cocoa and cream of tarter.
Whisk in 2 cups of water. (You have to whisk it a bit to get the cocoa powder mixed in even this well.)
Bring the syrup to a boil and boil for 10 minutes. Please note that the syrup does expand and will run out of the pan if you're not careful! You have to stand and watch it like a hawk and may even need to lift the pan off the burner to prevent boil-over.
Once the 10 minutes are up, remove from heat and add salt and vanilla. Cool the syrup, pour into desired container and keep refrigerated. Enjoy!

I store mine in a 1 quart Rubbermaid container like this:


I will add that this is sweeter and more chocolatey than Hershey's Syrup, so when making a glass or mug of chocolate milk you don't need to use as much to get the same flavor. Also, if you use real vanilla, you might want to add only 1 tsp., then taste and see if you want to add more. This last time I made it I used Watkins instead of the normal store-brand imitation and the vanilla flavor is much stronger than my liking. I think I will cut it back next time.

Chocolate Syrup

2 cups sugar
1 cup Cocoa
1/4 tsp. Cream of Tarter
2 cups water
1/4 tsp. salt
2 tsp. Vanilla

Combine sugar, cocoa, cream of tarter and water in a 2 quart, heavy saucepan. Bring to a rolling boil and boil for 10 minutes without stirring (watch carefully so it doesn't boil over!).

Remove from heat and stir in salt and vanilla. Cool, pour into storage container and store in the refrigerator.

This post is linked to Life As Mom and The Grocery Cart Challenge.

Thursday, January 21, 2010

Very Yummy Rice

One of my "In the Kitchen" Goals for 2010 is to try new recipes more often. This is one of my new recipes! It's simple, reasonably inexpensive (sorta - depends on how much you eat :P ), and quite delicious!! (And it makes a LOT!)


Very Yummy Rice

1/4 lb. (1 stick) butter - $.38 (sale)
1 huge onion, chopped fine - $.25
2 cups rice - $.56
2 cans beef consomme
*I used 28oz. of beef broth made with bouillon powder - $.12
8oz. sharp cheese, grated - $1.50
2 small cans mushrooms, with liquid - $1.58
1 cup toasted almonds
*I used 1/2 cup slivered - $1.79

Saute onion in butter. Add uncooked rice and simmer for 5 minutes, stirring occasionally. Mix all ingredients except almonds in a 9x13 baking dish. Bake at 325° for 1 hour. Stir in almonds before serving.

Total cost: $6.18

Like I said, it makes a lot, so depending on how many people you're serving, one pan could very easily do for 3 meals, making the cost per meal around $2. And, you could very easily leave out the almonds. My gracious, they cost an arm and a leg! I don't know how much flavor they add as much as they just add some nice "crunch."

This post is linked to Life As MOM's Ultimate Recipe Swap and The Grocery Cart Challenge Recipe Swap. Head on over to browse through more yummy recipes that are being linked up!!

Friday, January 15, 2010

Beef and Rice Stew

Last winter I tried this recipe for Hamburger Barley Stew. I had barley in my pantry and it looked like a good recipe to use it in. It made a LOT, and it was good, but it wasn't an instant favorite for Daniel and me (good enough to make it into my recipe book, though).

It wound up on my menu for last night, and I decided to tweak it a bit. Not much, but some. We like it alot better the new way. It was meatier, heartier (Daniel doesn't like really juicy soups) and a more reasonable amount for the two of us. We had some rolls in the freezer that I heated and served with the stew. It was a great meal, and we have enough leftover for Sunday :) This recipe would work in either the crockpot or on the stove. It was supposed to be in the crockpot yesterday but I got a late start and it ended up cooking on the stove :)

Oh, and the best part? I used up the last "rubber" potato that was hiding out in my pantry!!

Beef and Rice Stew
1 lb. lean ground beef, browned (Daniel suggested that stew beef would be good, too)
1 1/2 cups water
2 cans stewed tomatoes with basil, garlic and oregano
2-3 carrots, sliced
1 stalk celery, sliced
1 small - med. potato, diced
1 small onion, diced
1 1/2 tsp. beef bouillon or cubes
1/2 tsp. salt
1/4 ts. pepper
1/3 cup rice*

Brown beef in large pot, add remaining ingredients except for rice. Simmer on low heat for about 1 1/2 hours. Stir in rice, simmer for 20-30 minutes more. Enjoy :)

For the crockpot, brown the beef, dissolve the bouillon in water, stir everything (except rice) together in the crockpot. Cook on low all day, or high for 5-ish hours. Stir in rice 20-30 minutes before serving.

*I used white rice. If using brown rice, back up the rice-cooking time accordingly since brown rice takes longer to cook.

Click over to LifeAsMom and The Grocery Cart Challenge for more recipes from their weekly recipe swaps!!!

Thursday, September 3, 2009

Dump Cookin'

This summer I canned tomato sauce. Plain-O Jane-O sauce. I did it 'cause I wanted to be able to flavor and spice it up however I wanted it right then. Not want it one way and only have it canned another.

*dreamy smile*

This evening I'm making spaghetti and meatballs. The meatballs are from an el'cheapo sale back in the spring (as is the garlic bread that we'll have), and the spaghetti sauce is from my tomato sauce! The texture is perfect. Not too thick, not too runny. I must remember to plant more and can more next year... if Junior doesn't take too much of my time. I have a feeling that my sauce will be long-gone before winter's over.

Here's how I make spaghetti sauce:

Heat some Olive Oil in a pan till it's hot.
Add in a diced onion and some crushed garlic (oh, about 2 med. cloves worth).
Let the onions and garlic saute a bit; breath deeply to inhale the luscious fragrance!
Sprinkle in some Oregano and Basil (dried, unless you have fresh) until it looks "right"; let it toast a bit, and continue to soak up the deliciousness!!
Remember that the original recipe calls for Italian Style tomatoes, so shoogie in a good Tbsp. or so of Italian Seasoning.
Add a bit more Olive Oil if you want.
*insert wiggly eyebrows* Pour in about 1/2 cup red wine (NOT Port. Port wine is waaay too sweet for this kind of stuff. It ruins it. Trust me, I know.). Stir it around and let it cook till it's mostly absorbed (and the alcohol cooks off, promise!).
Add about 1 1/2 tsp. salt and several grinds of pepper.
Pour in 1 quart of tomato sauce.

Let it simmer for a bit and then do a taste-test to see if you need to add more of something :) I always let it cook a bit after adding something before I taste-test, that way the flavor has a chance to "bloom" and really get into the sauce. It provides a truer (more true?) representation of the full results.

Once you get the sauce pretty much perfected, you can add your meatballs. Or, if you're starting out with the raw deal, you would put it in after toasting the onions, garlic and spices and let it brown most of the way.

Let is slow-cook over low heat until your honey comes home, then dish him up a nice plate o' Spaghetti :) You might even have a drippy candle on the table ;)

And for some lessons on how to really dice and mince onions and garlics*, check out Pioneer Woman. Saves me a ton of time!!
*Link is to one of her recipes that includes both, she doesn't have a tutorial for garlics)

Friday, August 7, 2009

Macaroni Salad


With produce coming from my garden (well, I have to go get it...) in abundance, I want to enjoy as much of it fresh while I have it fresh and free! One of my favorite recipes for fresh peppers is Macaroni Salad. I am a little bit of a Macaroni Salad Snob when it comes to Macaroni Salads. Not all of them are created equal. Generally I can eat most of them, some are just gross, and this one, well, I don't usually come across it's rival at picnics or carry-ins unless I take it myself.

You need:
1/2 pepper, chopped
1/2 onion, chopped
1 carrot, grated
3 hardboiled eggs, diced


1/2 lb. pasta; cooked, drained and rinsed with cold water

Mix together the pasta, eggs, carrot, pepper and onion.

In a small bowl (or measuring cup), combine:
1 cup Miracle Whip or Mayonnaise
1 Tbsp. mustard
2 Tbsp. Red Wine Vinegar (or regular vinegar)


Pour over salad and stir to combine.

Eat some right away, or refrigerate to let the flavors "meld". I go for both.

Macaroni Salad
1/2 lb. pasta; cooked, drained and rinsed with cold water
1/2 pepper, diced
1/2 onion chopped
1 carrot, grated
3 hardboiled eggs, diced
1 cup Miracle Whip or Mayonnaise
1 Tbsp. mustard
2 Tbsp. red wine vinegar or regular vinegar

Combine pasta, pepper, onion, carrot and eggs in large bowl. In smaller bowl stir together Miracle Whip, mustard and vinegar; pour over pasta mixture. Cover and refrigerate until served.
Yields about 8 cups

And just in case my Wisconsin Cheese Friend wonders if I'm ignoring her request for my Potato Salad recipe... nope, this one is just a bit faster to make and I got started late. All in good time, my friend.

Disclaimer: I only posted a 1/2 recipe. It made about 2 quarts of finished salad, so unless you have an army to feed or want to eat it 3 meals a day for a week, I don't recommend making a whole recipe.

Tuesday, June 2, 2009

Pot Pie Experiment

Last week I made pot pie one day for supper.

My method for making potpie is to take whatever chopped poultry meat I have in the freezer, whatever vegetables I feel like adding (corn, beans, peas, carrots), some cream of mushroom or chicken soup (I prefer chicken), some chicken broth, stir it all together and put on the topping.

My ratios are generally for 1 cup of cooked/chopped meat, I use about 2-3 cups of vegetables and 1 can of cream soup and 1 cup or so of broth (till it "looks right"). Since my brother was here and I needed to make a bigger batch, I was using 2 cups of meat. I had 2 cans of cream of chicken soup and 2 cans of cream of mushroom soup in the cupboard. I needed 2 cans of soup but didn't want to use all of my cream of chicken. I noticed that I also had a couple cans of chicken noodle soup that had been free... hmmm....

I used 1 can of cream of chicken soup and 1 can of chicken noodle soup. It tasted and turned out perfect!! I usually have to add a little salt to the mix, but with the chicken noodle soup (concentrate) it was just right. It was moist but not too runny. I didn't have to find or make broth and you wouldn't know the noodles were in the casserole unless you specifically looked for noodles (and how many people do?).

This might just become my new "recipe" for pot pie.

Friday, April 10, 2009

Orange Glazed Chicken Stir-Fry

This recipe is just loaded full of yummy, juicy, flavorful tenderness. Served with a side of rice, I could eat it all day.

Be sure to hop on over to Gayle's blog to find a whole passel of recipes as she is hosting her weekly Friday Recipe Swap!

You will need:
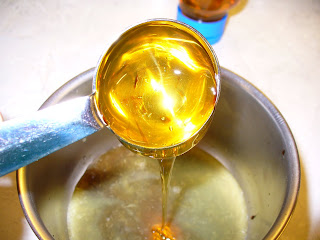
Orange Juice, Apple Cider Vinegar, Honey,
Soy Sauce, Cornstarch, Oil (I used Olive because that's
what I had!), Rice, Chicken, and
your favorite stir-fry vegetable blend.

In a small bowl, combine 2 Tbsp. Vinegar
2 Tbsp. Orange Juice
4 tsp. Soy Sauce
2 Tbsp. honey and
1 1/2 tsp. cornstarch.
(sorry for the blinding whiteness)
Whisk it all together and set aside.Cut into bite-sized pieces 12 oz. of chicken
(about 2 boneless, skinless chicken breasts)
I'm using my Cutco Small Chef Knife, and the chicken
is still partially frozen. Sooo much easier to cut that way.
And the great knife really helps, too. I love my Cutco knives!
Start the rice cooking. I used 2 cups boiling water
and 1 cup rice (= 3 cups cooked).
Bring the water to a boil, pour in the rice, give it a stir,
put the lid on and turn the burner to Low or Off.
Set the timer for 20 minutes and forget about it.
While the rice is cooking away, put 2 Tbsp. oil into a large skillet
(or wok if you're cool enough to have a pan for every kind of recipe).
Stir fry the veggies until crisp-tender.
Set the veggies aside and stir-fry the chicken until
no longer pink. I add a little more oil to the skillet to do this.
The bowl of potion that we made earlier? Time for it to go to work.
Pour the honey/orange juice/soy sauce... you get the idea...
mixture over the chicken. Cook and stir until it thickens a bit.
Stir in the vegetables and cook until everything is heated through.About this time the rice should soon be done.
When it is, lift the lid and beautiful, cooked rice should be
looking at you. I'm not a pro. rice cook, but that's how I do it.
Plate the goods and dig in!!

Orange Glazed Chicken Stir-Fry
2 Tbsp. vinegar
2 Tbsp. orange juice
4 tsp. soy sauce
2 Tbsp. honey
1 1/2 tsp. cornstarch
12 oz. chicken, cut up (about 2 boneless, skinless chicken breasts worth)
2 Tbsp. oil
4 cups frozen vegetables
cooked rice

Combine vinegar, orange juice, soy sauce, honey and cornstarch in small bowl; set aside. Start rice cooking. Heat oil in large skillet or wok. Stir-fry vegetables until crisp-tender; set aside. Add chicken to skillet and cook until no longer pink (may add additional oil if needed). Stir sauce into chicken, cook and stir until thickened. Add vegetables to skillet, cook and stir until heated through. Serve over rice.

Tuesday, March 31, 2009

Turkey Turnovers Recipe

This is a very yummy recipe that is fairly easy to make. This evening I made just 1/4 of the recipe since I didn't have enough stuff to make a whole recipe, and I didn't need all 12 turnovers :)

For the filling, you need:celery, onion, butter, flour, salt, pepper, milk, cooked & cubed turkey, parsley

In a saucepan or skillet, melt 1 Tbsp. butter and cook 1/4 cup chopped celery and 1 Tbsp. chopped onion until tender.

Stir in 1 1/2 Tbsp. flour, 1/2 tsp. salt & a little pepper.

Add 1 cup + 1 Tbsp. milk, cook and stir until thickened.

Mix in 1 cup cooked, cubed turkey and 1 Tbsp chopped parsley.
Remove from heat and set aside.

For the pastry:
flour, salt, butter, shredded cheddar cheese, sour cream

Combine 1 cup flour and 1/4 tsp. salt in mixing bowl.
Cut in 6 Tbsp. butter until mixture resembles coarse crumbs.

Add 1/2 cup shredded cheddar cheese and mix in 1/2 cup sour cream until dough forms.
(It's a pretty sticky, soft dough)

At this point resist all urges to taste the dough.
It will be begging you to taste it.

Shape dough into a ball and place on a well-floured surface.
I like to flour the top of the dough ball instead of the rolling pin.
Just my preference, though. You do whatever floats your boat and gets
your dough rolled out all pretty.

Roll dough out to a 12"x12" square.
Use the ruler that's in your kitchen drawer to measure.
You have one in your kitchen drawer, right?
Your kitchen is not complete without a ruler to use on food.

And now, imagine that I didn't forget to take pictures of the next two steps:

Cut dough into four 6" squares.

Divide filling and place filling in one corner of each square.
Fold dough diagonally over filling and seal edges with fork tines.
Or your fingers. Or get your kids to do it.

Place on a greased baking sheet and cut vents into the turnovers.
Bake at 350° for 20 minutes or until golden brown.

Enjoy!!

Turkey Turnovers (whole recipe)
Yield: 12 turnovers

Filling:
1 cup chopped celery
1/4 cup chopped onion
1/4 cup butter
1/3 cup flour
1 - 2 tsp. salt
1/4 tsp. pepper
1 1/4 cups milk
4 cups cooked, cubed turkey
1/4 cup chopped parsley

Pastry:
4 cups flour
1 tsp. salt
1 1/2 cups butter
2 cups (8 oz.) shredded sharp cheddar cheese
2 cups sour cream

In a large skillet, cook celery and onion in butter until tender. Blend in flour, salt and pepper. Gradually add milk; cook, stirring constantly, until thickened. Add turkey and parsley. Set aside.
In large bowl combine flour and salt; cut in butter until mixture resembles coarse crumbs. Stir in cheese. Add sour cream, mixing until dough forms a ball. Divide dough in half. Roll out one half of dough into 18"x12" rectangle. Cut into 6" squares. Repeat with second half of dough.

Place 1/3 cup of filling on each dough square. Fold diagonally to form a triangle; seal edges by pressing down with fork tines. Cut slits in top of turnovers. Place on greased baking sheets.

Bake at 350° for about 20 minutes or until the crust is golden brown.